
Getting Your First PLC Up and Running: A Beginner’s Guide to Installation Leave a comment
Getting Your First PLC Up and Running: A Beginner's Guide to Installation

So, you’ve decided to dive into the world of automation and have a shiny new Programmable Logic Controller (PLC) in your hands. Congratulations! That little box holds the power to automate anything from a simple home project to a complex industrial process. But before you can bring your automated dreams to life, you need to tackle the first crucial step: installation.
This guide will walk you through the essential tips and advice for getting started with your new PLC installation, from the initial preparations to powering it on with confidence.
Before You Begin: The Pre-Installation Checklist
A successful installation starts long before you even touch a screwdriver. Proper planning can save you headaches and prevent costly mistakes down the road.
Read the Manual (RTFM!): It might sound obvious, but it’s the golden rule for a reason. Your PLC’s manual is your single most important document. It contains specific information about your model’s power requirements, operating environment, wiring diagrams, and communication protocols.
Select the Right Location: Your PLC is a piece of industrial electronics and needs a suitable home. Choose a location that is:
Clean and Dry: Protect your PLC from dust, moisture, and corrosive elements.
Well-Ventilated: PLCs generate heat, so ensure adequate airflow to prevent overheating.
Vibration-Free: Excessive vibration can damage internal components.
Accessible: You’ll need easy access for wiring, troubleshooting, and maintenance.
Gather Your Tools and Materials: Having everything on hand before you start will streamline the process. You’ll typically need:
Screwdrivers (various sizes)
Wire strippers and cutters
Crimping tool and ferrules (highly recommended for a secure connection)
DIN rail cutter
Mounting screws
Appropriate wiring (check the manual for recommended gauge and type)
Labeling machine or tags
Plan Your Layout: Sketch out where your PLC, power supply, input/output (I/O) modules, and terminal blocks will be mounted within your enclosure. A logical layout makes wiring neater and troubleshooting easier.
The Main Event: Hardware Installation and Wiring
With your preparation complete, it’s time to get hands-on.
1. Mounting the Components:
Most PLCs and their associated components are mounted on a standard DIN rail. Securely mount the DIN rail in your enclosure according to your layout plan. Then, snap your PLC, power supply, and I/O modules onto the rail.
2. Power Supply Connection:
This is a critical step. An incorrect power connection can permanently damage your PLC.
Verify Voltage: Double-check that your power supply’s output voltage matches your PLC’s input voltage requirements.
Grounding is Not Optional: A proper ground connection is essential for safety and to protect your PLC from electrical noise. Connect the ground terminal of your power supply and PLC to a common ground point.
Phasing: Pay close attention to the live (L) and neutral (N) connections.
3. Wiring the Inputs and Outputs (I/O):
Your I/O modules are the bridge between your PLC and the real world.
Follow the Wiring Diagram: Your PLC manual will have detailed wiring diagrams for your specific I/O modules. Follow these meticulously.
Use Ferrules: For stranded wires, using ferrules creates a secure and reliable connection in screw terminals, preventing stray strands from causing short circuits.
Label Everything: Label every wire at both ends. This may seem tedious, but it will be a lifesaver during troubleshooting.
Separate Power and Signal Wires: Run high-voltage power cables separately from low-voltage signal cables to prevent electrical noise from interfering with your PLC’s operation.
Sensor and Actuator Wiring: Connect your sensors (e.g., switches, proximity sensors) to the input modules and your actuators (e.g., solenoids, motor starters) to the output modules. Pay attention to whether your I/O is sinking or sourcing.
Avoiding Common Pitfalls: Mistakes to Steer Clear Of
Inadequate Power Supply: Using an undersized power supply can lead to unpredictable behavior and system shutdowns.
Loose Connections: A loose wire can cause intermittent faults that are incredibly difficult to track down. Ensure all connections are tight.
Ignoring Polarity: Reversing the polarity on DC circuits can damage your components.
Skipping the Ground Wire: As mentioned, this is a major safety and operational risk.
“Messy” Wiring: A rat’s nest of wires is not only unprofessional but also makes troubleshooting a nightmare. Keep your wiring neat and organized.
The Software Side: Getting Ready to Program
With the hardware in place, the next step is to communicate with your PLC.
Install the Programming Software: Install the PLC programming software provided by the manufacturer on your computer.
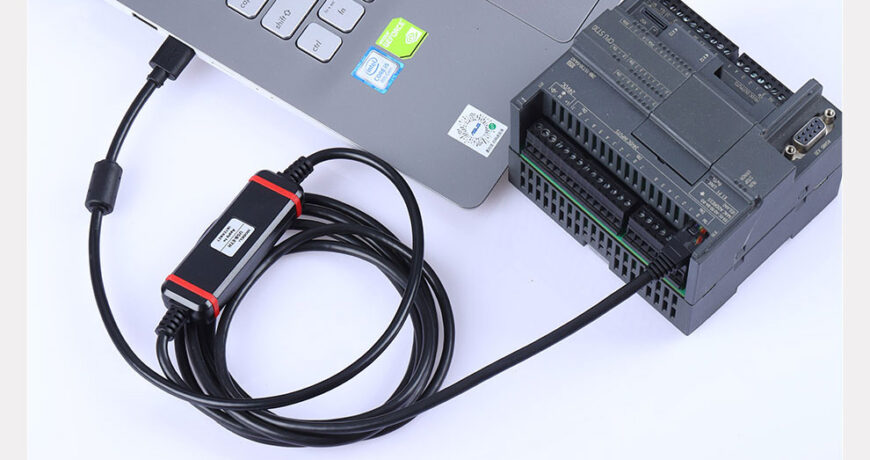
Establish Communication: Connect your computer to the PLC using the appropriate cable (e.g., Ethernet, USB). You may need to configure the communication settings in the software, such as the PLC’s IP address.
Create a New Project: Once connected, create a new project in the programming software. This is where you will write and download your automation logic.
Powering Up for the First Time: A Moment of Truth
Before you flip the switch, do one last check:
Visually inspect all your wiring.
Ensure there are no loose strands or potential short circuits.
Confirm all components are securely mounted.
When you’re ready, apply power to the system. Look for the status lights on the PLC. You should see a “Power” or “PWR” light illuminate, and likely a “Run” or “RUN” light that may be flashing or solid, depending on the PLC’s state.
Congratulations! You’ve successfully installed your new PLC. You’re now ready to take the next exciting step into the world of automation: programming your PLC to bring your ideas to life. Remember to take your time, be meticulous, and always prioritize safety. Happy automating!